ADOBE CONNECT
ADOBE CONNECT
Need to have a full featured video conference with other members of your ERN? No problem, Adobe Connect, which is freely available inside the ERN collaborative platform, allows you to do exactly that.
Adobe Connect web conferencing software service online will allow you to host and manage a web conference. The system supports content sharing, meaning you can share documents, whiteboards and even your entire screen.
Adobe Connect
Installing Adobe Connect Plugin
When your session starts for the very first time, you are required to accept the installation of a plugin which enables you to run Adobe Connect in your browser.
In case you need assistance with the installation of the plugin, please see link below
https://helpx.adobe.com/adobe-connect/connect-downloads-updates.html
When it is done your session should start immediately, or by refreshing the screen.
Getting Started
Instructions on how to set up the conference can be found here
The first steps in most conferences will be for the Host to enable each participant to use their Microphone and their Webcam.
The host just need to place the mouse over the participants name and the menu to enable Microphone and Camera will appear
*this same menu can be used to make other users hosts, or presenters

Webcam
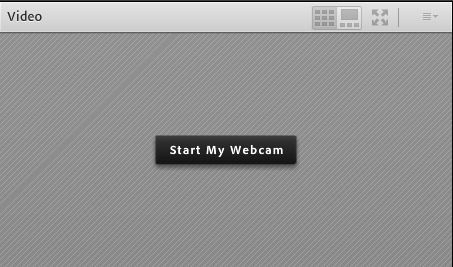
Once the host has enabled the Camera and Microphone for each participant they will be able to start their camera by clicking on Start my Webcam
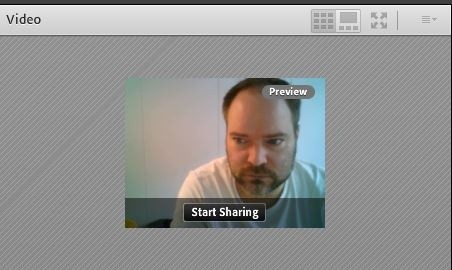
The camera will initially show a preview. It is only when you click on Start Sharing that the other participants in the conference will see your video feed
Audio
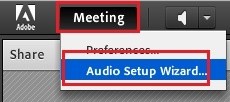
To start using the audio it is recommended to first go through the Audio Wizard. The wizard assists you in setting up Adobe Connect to use the correct Audio playback and Audio recording device which is very important if the device you are working on has more than one.
To access the Wizard simply click on Meeting and Select Audio Setup Wizard
Once it start follow the on-screen instruction in order to set up your speakers and microphone
To start using the microphone the participants just need to click on the microphone icon at the top of the screen, this way it will turn green to show that it is active
By hitting the small triangle next to the microphone icon you will also have the possibility to choose which microphone to use, in case your system has more than one connected.
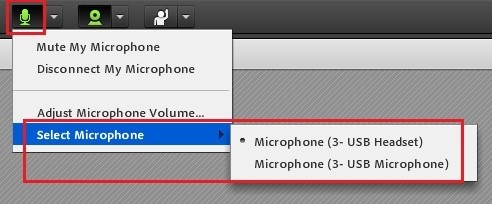
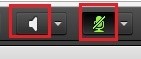
Clicking the Microphone icon again will mute it. The same feature can be used on the speaker if you wish to mute the incoming sound. When you mute the speaker it goes from green to grey, whereas when you mute the microphone, it changes the icon to a microphone with a line over it. You simply click on them again to un-mute
Content Sharing
Adobe Connect support the sharing of multiple types of content. Sharing content can only be done by Presenters and Hosts. The Host can elevate a Participant to a Presenter, or even a Host by using the same menu shown in the Getting Started Section.
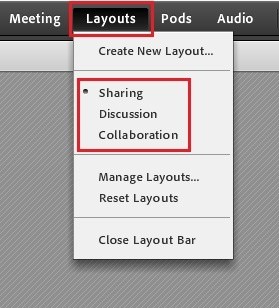
Sharing of Content is only available when the meeting layout is set to Sharing, which is the default layout. Changing the layout is a privilege only the Host has.
The layout can be changed in the Layouts menu at the top:
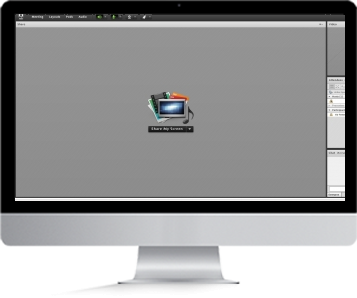
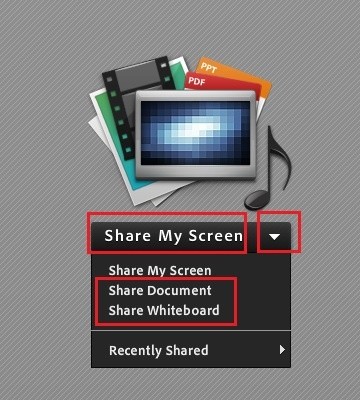
When the layout is in sharing mode the option to share will be displayed in the middle of the screen.
You can directly press on Share My Screen, if you wish to share your entire screen. If you click the small triangle next to Share My Screen you will have the option to share Documents, or a Whiteboard, as well
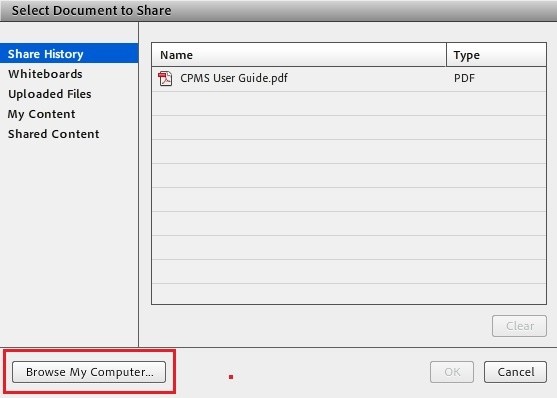
If you select the option Share Document you will be presented with a screen where you can browse your computer for documents to share.
* in the section Uploaded files you will find documents already uploaded to the conference. These are unique to each conference and document uploaded in one conference will not appear in another one
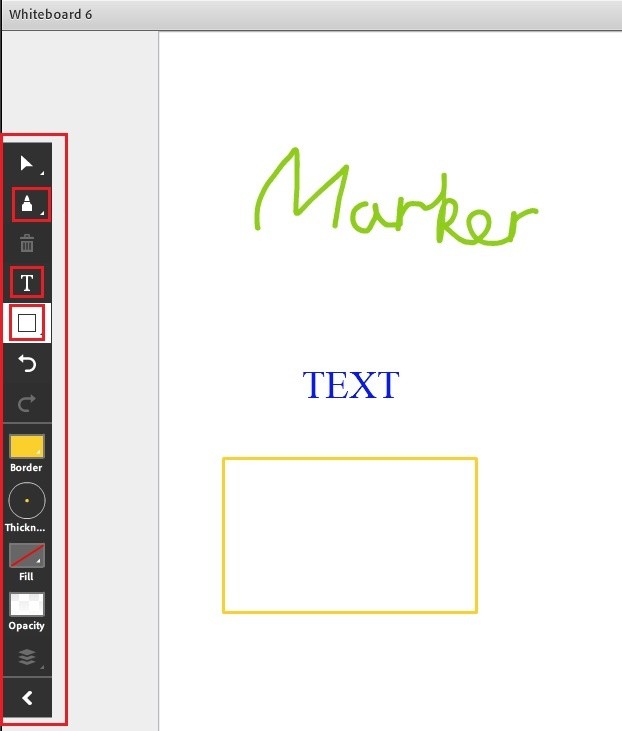
If you choose the option to share a Whiteboard the system will display a new whiteboard. The whiteboard can only be edited by Hosts and Presenters, not participants.
The whiteboard has several tool on the left which can be used. There is a Marker that functions as a Pen. There is a Text tool for writing, and finally there is a Rectangle tool, which allows you to create different kinds of squares
Additional Help
The above is only a small portion of what you can do with Adobe Connect
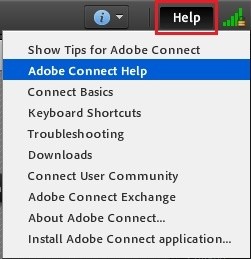
For additional information please refer to the Help section of the system, which can be found at the top of the screen
Finally, the online user guide for Adobe connect can be found here